Is my phone 6 GHz ready? (WiFi 6 vs 6E)

Over the past few weeks, I have received a few complaints about “This phone does not support 6 GHz networks” warning message in WiFi Analyzer when a mobile supports WiFi 6.

Let’s clarify this:

WiFi 6 does not mean any support of 6 GHz.
WiFi 6 = 6th generation of WiFi (802.11ax), it still uses 2.4 GHz and 5 GHz.

WiFi 6E = 6 GHz support (extended 6GHz spectrum for WiFi 6)

So, if there is a WiFi 6E flag in the specification of your phone, it can use 6 GHz networks.
But if there is only a WiFi 6, your phone cannot use 6 GHz.

If you want to ensure about this, WiFi Analyzer can identify if your phone supports 6 GHz.

How to find your lost BT earphone or smartwatch?

It’s very common that people lose their earphone or bt band or smartwatch. Sometimes they just don’t know where they put it, sometimes the device is really lost somewhere outside. A lot of people lose their smartwatch during running/walking in a forest because it comes out from the bracelet. Some people just find their earphone in the bed under the clothes after days…

But what should you do when you realize that your bt device has been lost?
I will show you in 3 easy steps using my Samsung Galaxy Buds as example.
The most important thing, you should start finding it immediately. The device must be alive (turned on state) for any searching. If the earphone or watch is completely drained, it will not emit Bluetooth signal anymore!

Step1:

Download Bluetooth finder app and start it: Bluetooth Scanner – Bluetooth finder – pairing

Step 2: Go to the last known position and wait until the app finds the lost device. If the device is within range and alive, it will find it. The range can be between 10-100 meters, depending on the signal strength and the bt protocol. bt 5.0 devices can be detectable even from 100 meters as well, bt 4.0 devices only from 10 meters.

Step 3: After the device has been detected, just click on “DEVICE FINDER“.

This will draw a chart about the signal strength, the strongest signal the closer.
Just play it like a hot or cold game:
– start moving, if the signal strength is increasing, you are closer
– if the signal strength is decreasing, you are farther.
– do it until the signal strength becomes ~0 dBm. Congratulation, you are next to the device.

If the searched device is an earphone or headphone, you can allow sound finder function as well. This will play a very loud beep signal in the earphone, so you can find it using your hearing as well.

That’s all, hopefully you could locate and find your lost device.

SD Card Test: How to remove temporary files accidentally remained on the SD card

When SD Card Test performs a speed test, it creates temporary file(s) (for reading and writing) that will consume space. These files are deleted automatically when you quit from the application.

But if your phone restarts or crashes during the tests, these files can remain on your phone and consume the free space.

Remark: if the phone crashes during SD card test, that means your phone isn’t stable using this card and this SD card is possible damaged or it’s in bad condition.

How can you remove these temporary files and get the free space back?

You have the following options:

a (recommended), start SD Card Test again.
To remove the temporary files immediately, go to Settings and click on “Remove temporary files now” button.

b, Alternatively (or if the SD card was selected manually via browsing), choose the same SD card that you’ve used previously, then start the test just for a moment (start then stop the test immediately).
This way, the app will delete the old temporary file and create a new test file. It will be deleted when you quit from the app.

c, If the temporary files are stored on SD card (not in the internal storage), open a file manager, go to sd card/Android/data/com.pzolee.sdcardtester/cache and remove sdcardtester-file-N-N.txt files.

d, If none of the above steps helped, you can reinstall (uninstall/install) the app, the uninstall process will delete all files related to the application.

Synology NAS – OpenVPN: enable certificate based authentication

By default, you can enable only username-password based authentication for OpenVPN in the GUI.

It’s not so secure, using a certificate based authentication gives you higher security and it can protect against MITM attack.

But you can only set this in the configuration file of the OpenVPN service, that means you have to login to the NAS via SSH.

I assume you already enabled OpenVPN and configured your NAS to use certificate (https) (so you have a CA and you can generate certs and keys), so the content below will only describe the certificate based authentication.

Enable OpenVPN

Enable OpenVPN


preconfigured PKI

preconfigured PKI in NAS

For the next part, you need a little skill and experience in console usage, so please do it only if you know what you do!

First enable ssh:

Go to control panel, terminal, and enable SSH service

Enable SSH


Then login to the NAS and change the VPN settings


$ ssh myadminuser@192.168.1.102
myadminuser@mynas:~$ sudo su
cd /usr/syno/etc/packages/VPNCenter/openvpn
ash-4.3# vim openvpn.conf
client-cert-not-required ->remove this line or disable using # char at the first place like #client-cert-not-required

To save the change and exit from vim (it’s a console based editor), press ESC key, then type the next text:
:wq
and enter (write&quit, if you don’t want to save type :q!)

Now restart the NAS, or disable&enable the vpn setting in the GUI to restart the vpn service.

Finally, if you want to access your NAS via OpenVPN from your Android based mobile:

Install OpenVPN to the phone

Download from GPlay: OpenVPN

Click + and import profile from file.

Create the config file similar to this one:


client
remote mynas 1212
auth-user-pass
reneg-sec 0
cipher AES-256-CBC
auth SHA512
comp-lzo yes
dev tun
dev-type tun
proto tcp
port 1212
route '192.168.1.0' '255.255.255.0' '10.8.0.5' 0
nobind
auth-nocache
script-security 2
persist-key
persist-tun
user nobody
group nogroup
<cert>
-----BEGIN CERTIFICATE-----
MII...here add the content of your certificate file
-----END CERTIFICATE-----
</cert>
<key>
-----BEGIN RSA PRIVATE KEY-----
MII...here add the content of your key file
-----END RSA PRIVATE KEY-----
</key>
<ca>
-----BEGIN CERTIFICATE-----
MII...here add the content of your CA certificate
-----END CERTIFICATE-----
</ca>

Back to the future

Just a little historical overview about my apps. It is really funny how my apps looked at the beginning 🙂

Go back to 2013. At this time, I had network issues (slow speed and broken connection), and wanted to check if the issue comes from the router or the Internet provider. But I didn’t found any useful app for my Android mobile (it was an HTC Desire X and ran Android 4.1. Well it’s still working, but unfortunately broken).

htc-desire-x-lg-v30

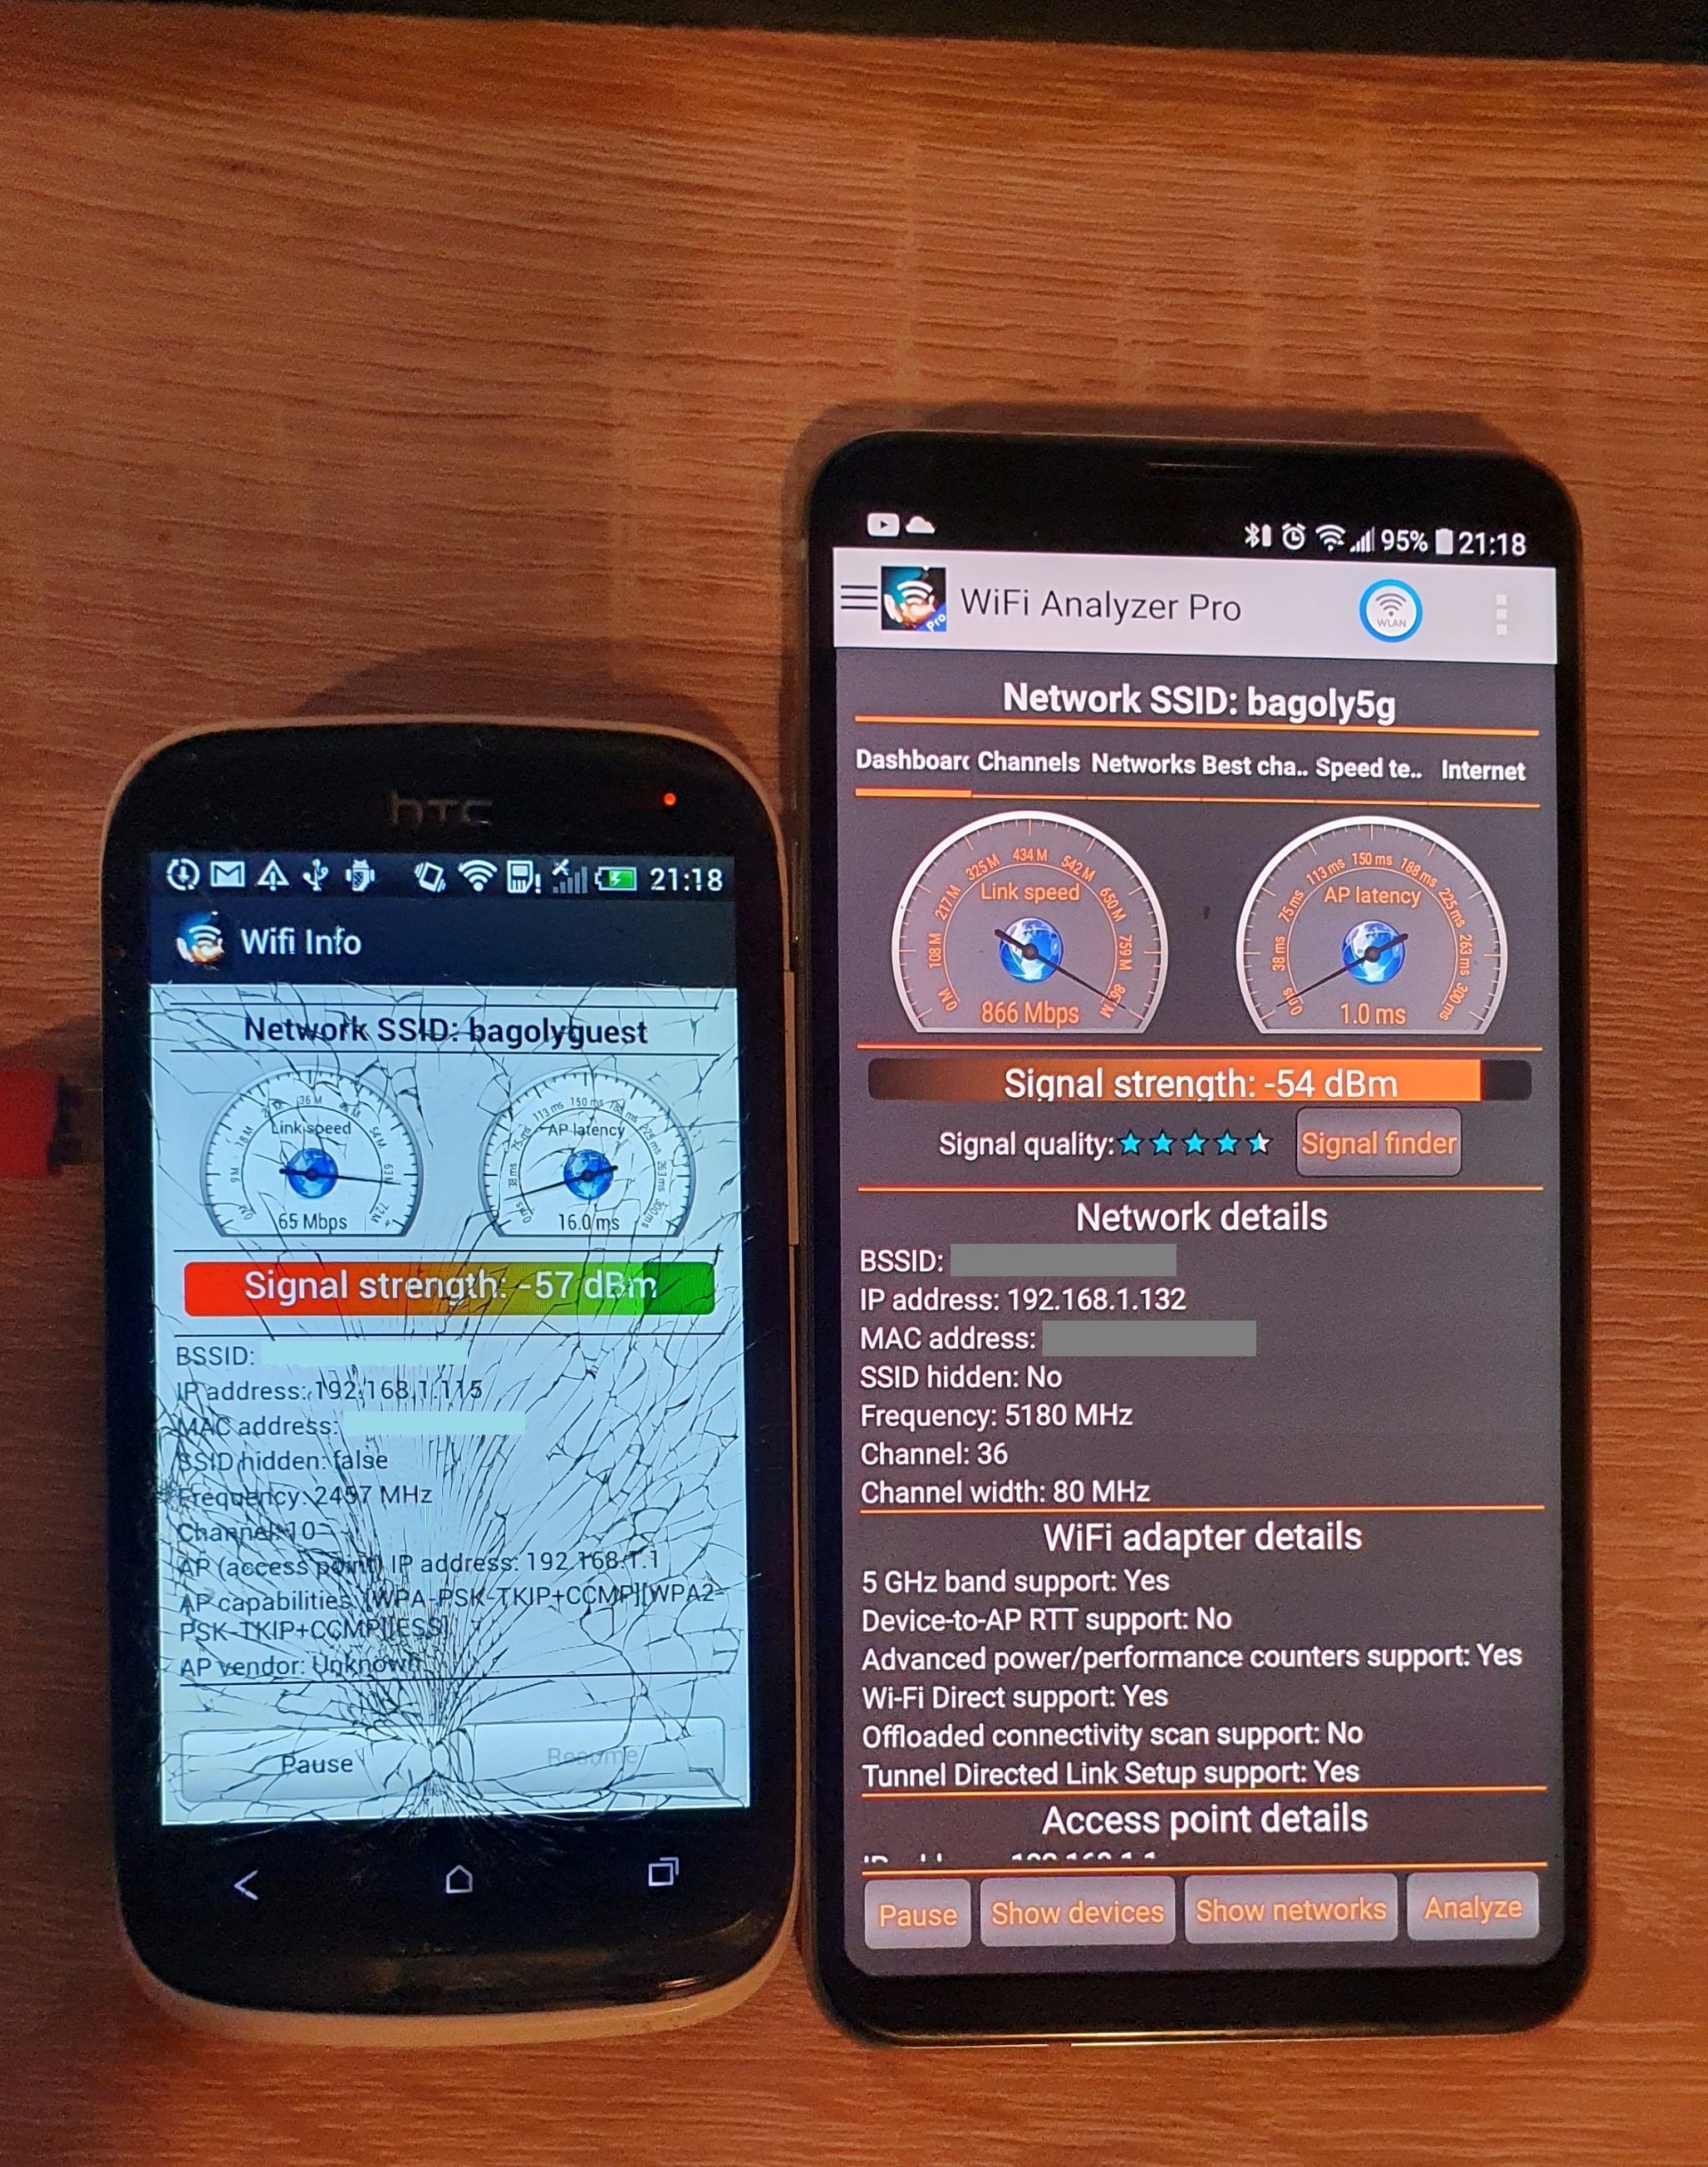
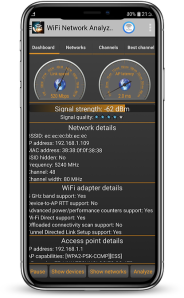
WiFi Analyzer v1.0 on my old HTC Desire X and v3.1 on my current LG V30. The light theme is still available in settings 🙂


So I decided to write a custom one that can test the LAN speed. It was “WiFi Speed Test” or its original name “Local WiFi Speed Tester”. It was so simple, just could do a local network speed test between my mobile phone and my laptop. Finally, I found that the issue was at my Internet provider.

But if it was useful for me, why not to upload it to Google Play for others? And I uploaded it. This is how it began in 2013…

Just look how they looked in 2013 vs in 2020:

wst-compare

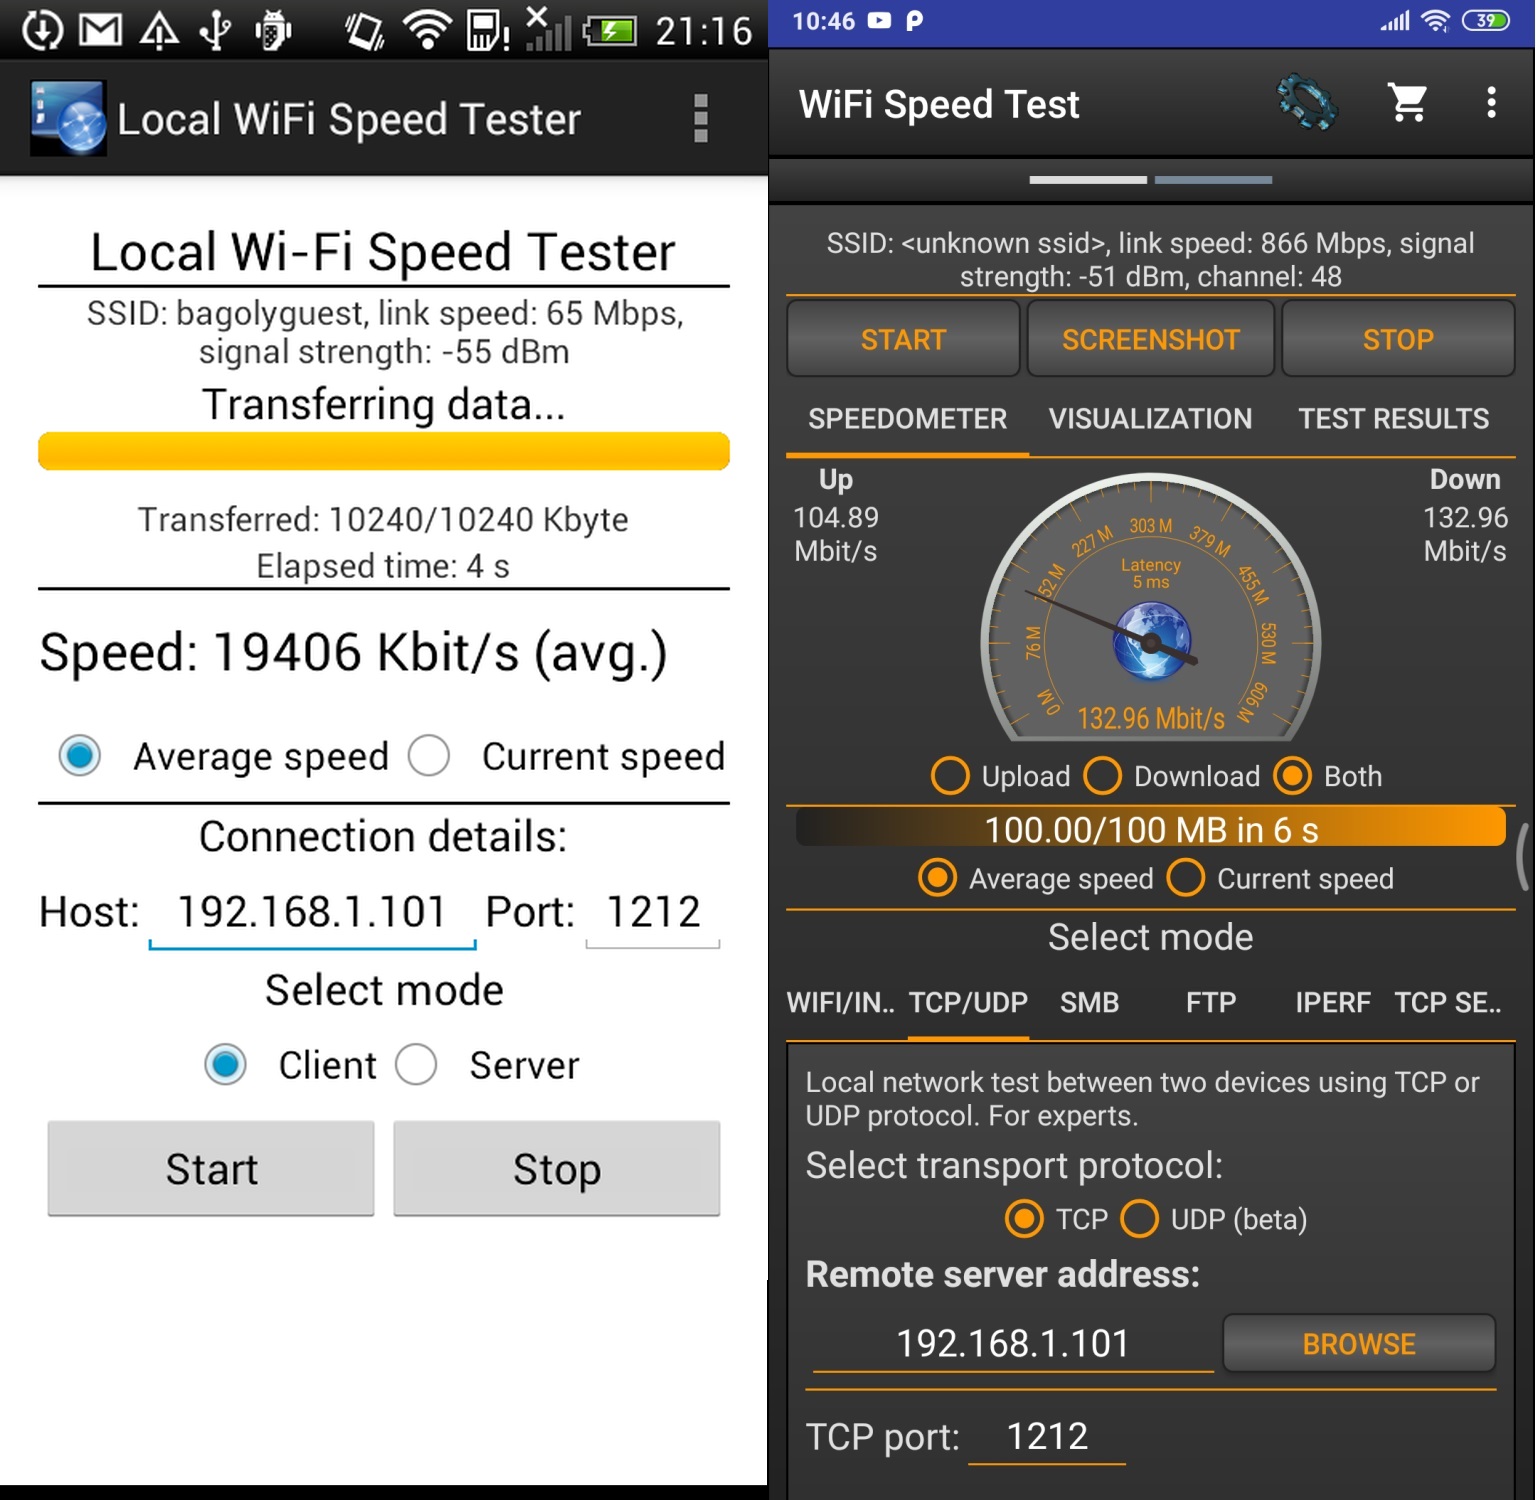
v1.0 (2013) vs v4.0 (2020)


It could do only a simple TCP performance test without any visualization. In 2020, it already supports almost all popular protocols.

Later, I dived myself into the deepness of WiFi, I just wanted to learn and to understand how WiFi networks work to improve my WiFi network.

This is how WiFi Analyzer was born (original name: Wifi Info). We are still in 2013, in December.

In the original v1.0 version there was only one tab, and displayed only the basic information…

wifi-analyzer-compare

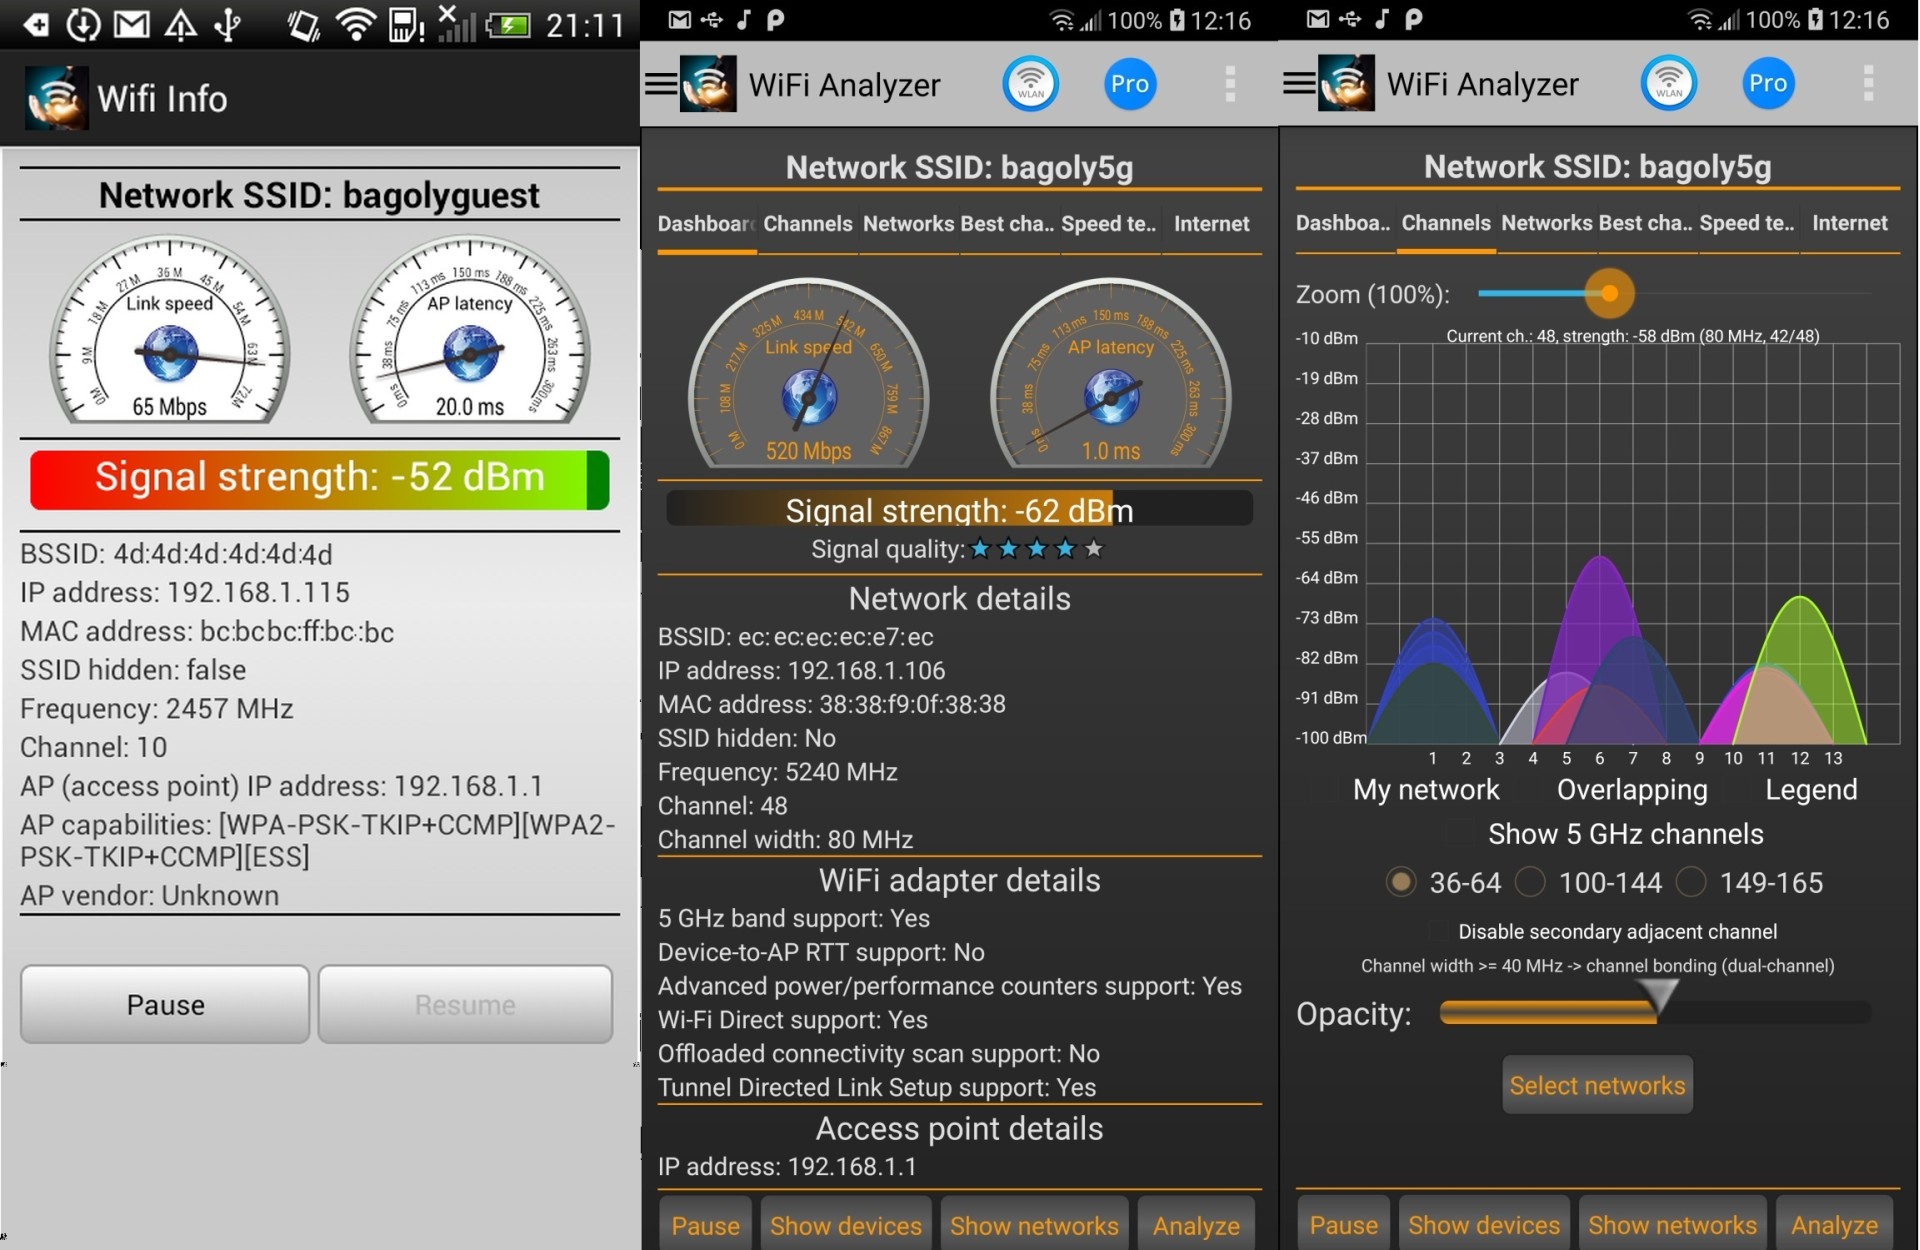
v1.0 (2013) vs v3.0 (2020)

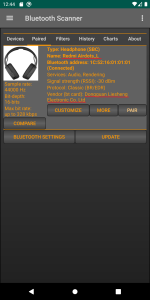
In 2013 and in the next few years, WiFi Speed Test was my most popular app. Later, WiFi Analyzer took its place and became my most popular app until Bluetooth Scanner was born (but it’s another story).

Network Scanner: new functions

From v2.5 (currently in staged rollout phase), there are a lot of new features in Network Scanner:

  • play beep sound when a device found during scanning
  • Hide a specific device from search
  • New filters:
    • Name
    • IP Address
    • MAC Address
  • and finally a new tab: Network
  • it contains a few useful information about your network

Screenshots about the new features:


How to detect fake Xiaomi Redmi Airdots?

device-2019-12-13-134457Recently I found an interesting article on Reddit: Сheck your Redmi Airdots (Mi True Wireless Earbuds) for the Original

This guy used my Bluetooth Scanner app to detect if a Xiaomi airdots is original or fake.
What a nice use-case, I never would have thought about it!

In a few words:

“Original airdots always have the two vendors: Dongguan Liesheng Electronic Co. Ltd. and Dongguan Hele Electronics Co. Ltd
Fake airdots don’t have any vendor, written unknown.

Left earbud (Redmi Airdots_L), Right earbud (Redmi Airdots_R).
Fake earbuds both are Redmi Airdots_R.”

For more details please see the article linked above.

WiFi speed test in WiFi Analyzer Pro

device-2019-10-28-172616
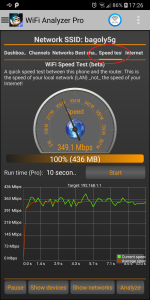
Test the speed of your WiFi network with WiFi Analyzer Pro! This new feature is available from v3.0.6 and from Android 9.0 or higher (currently v3.0.6 is in staged rollout phase but will be available for everyone soon).

Using this function, you can test the speed of your WiFi local network (LAN) easily. Just select “Speed test” tab and start the test.
It measures the speed between your phone and the router (so this is definitely not an Internet speed test)

Important: the measured speed is not the speed of your Internet access, it is the speed of your local network.

Android 10: Improve WiFi scan accuracy (disable throttling)

wifi-scan-throttling-turn-off
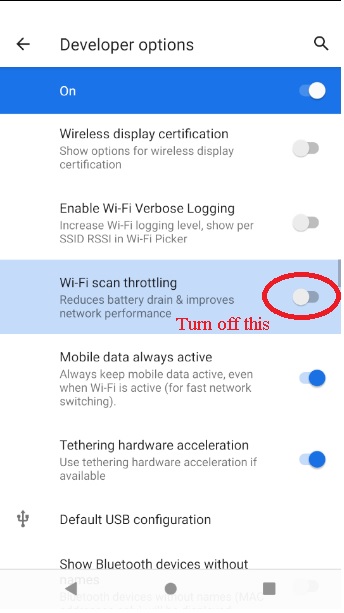
There is an important change in Android 10:

On Android 9 (Pie), each WiFi analyzer app could scan only four times in a 2-minute period (link).  Obviously, this was bad and caused low accuracy if you wanted to set up your WiFi network via WiFi analyzer apps. This bad behavior affected my WiFi Analyzer app as well.

The good news that you can disable this throttling on Android 10 and you can get the most accurate scan result. It is very useful if you want to find the best settings for your WiFi network.

How to disable throttling:

  1. First activate developer options:
    Go to Settings > About phone > Software information > Build number (or just Settings > About phone > Build number, it depends on your phone).
    Tap on the build number seven times then you will get a notification that you are now a developer
  2. Then go to Settings > Developer options and find “Wi-Fi scan throttling” > disable it
    (or Settings > System > Advanced > Developer options)

After that WiFi Analyzer  can scan your network continuously and you will receive the most accurate scan results.

wifi-analyzer

WiFi Analyzer: over one million downloads!

Wsmartmockups_jwci0r43
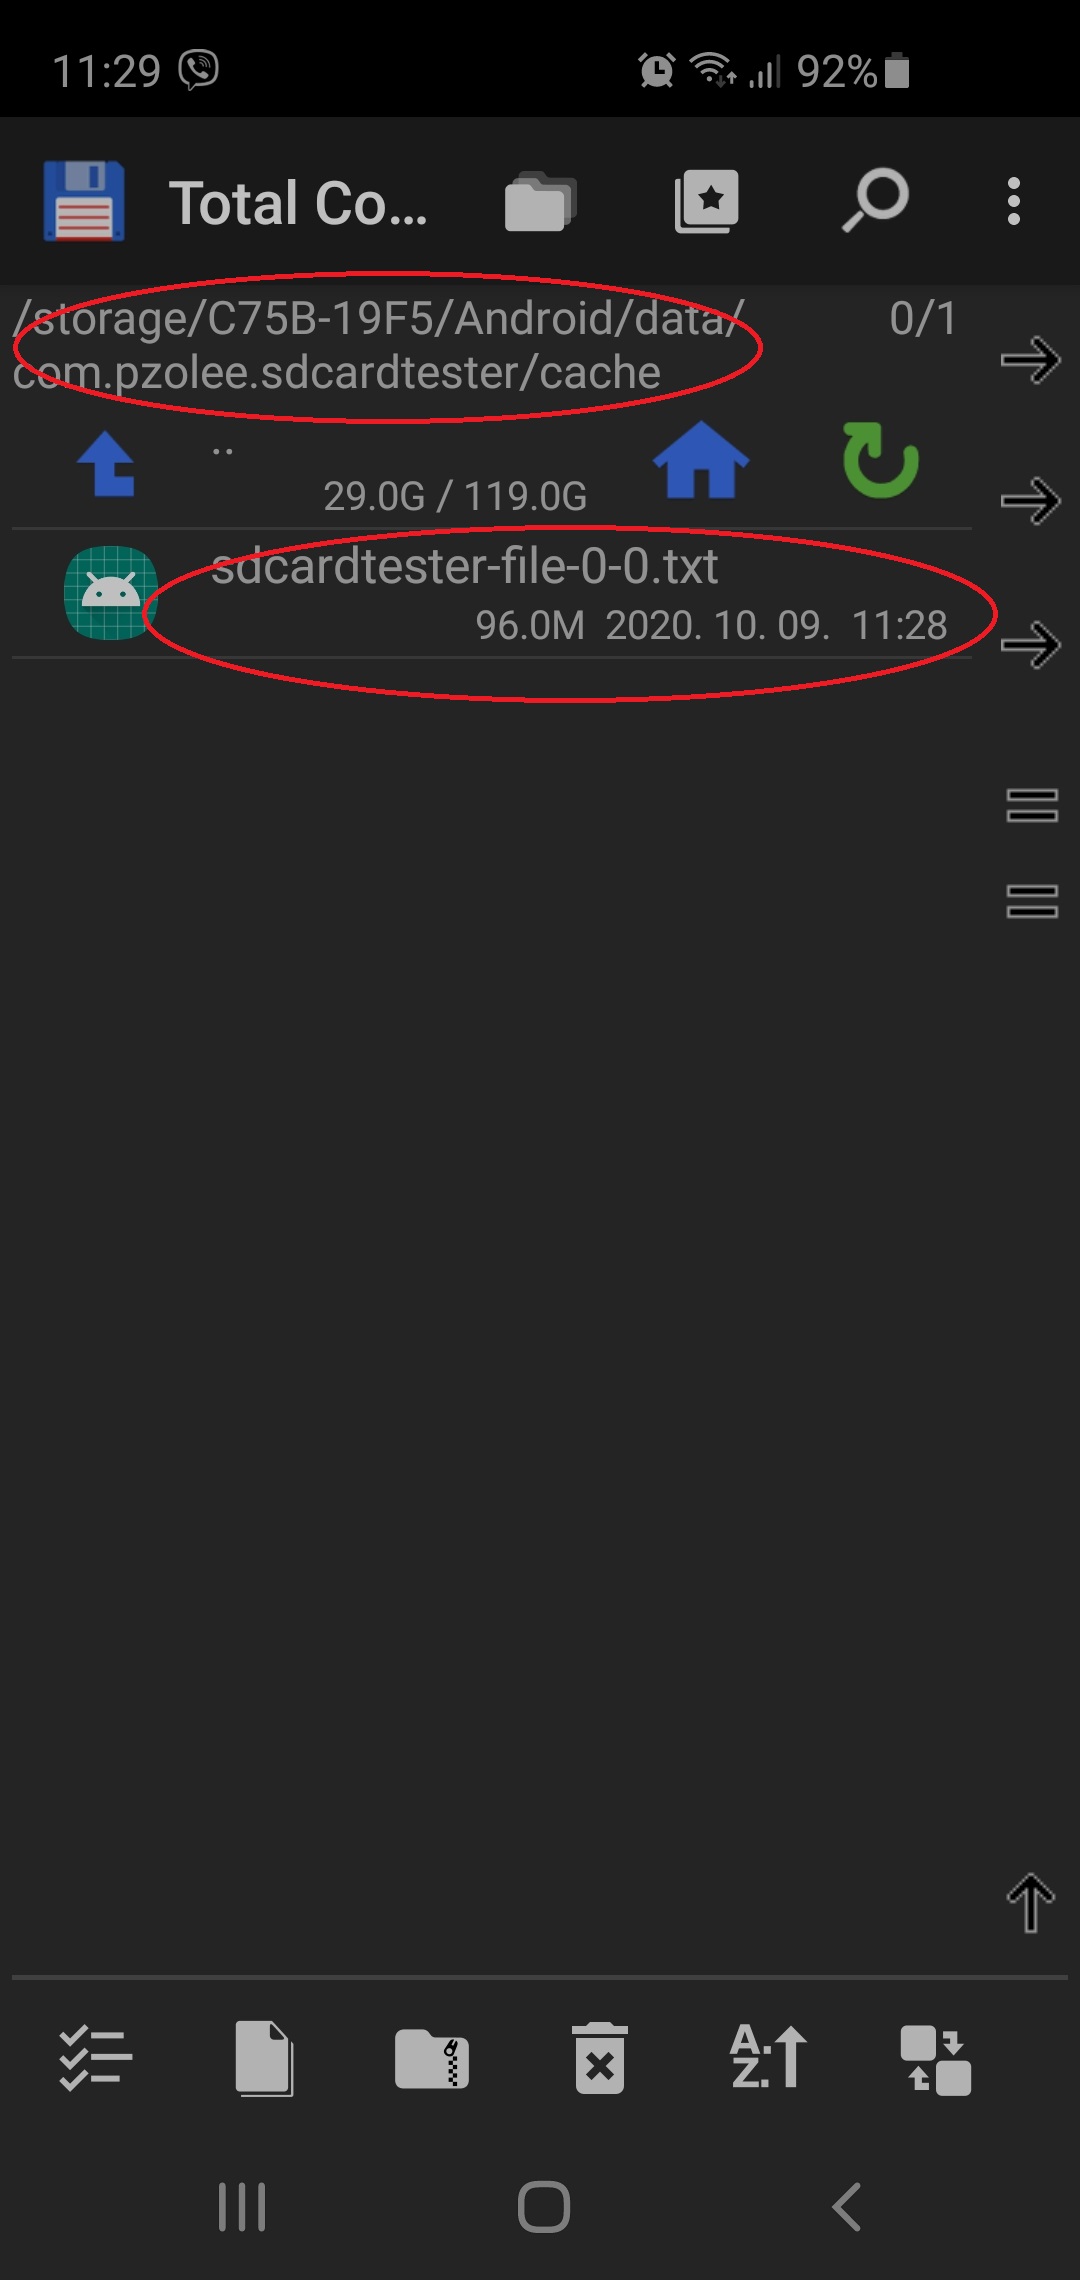
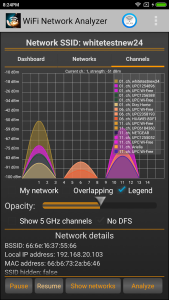
iFi Analyzer is over 1 million downloads! Thank you! (Hopefully you enjoy using my apps!)

You can download it from here: WiFi Analyzer